If you asked me to create a natural, refined look with makeup a year ago, I would have fumbled and stumbled and stammered as a confused and hopeless clean-faced girl. I never knew how to work the makeup, or how to allow the makeup to work for my strong facial features, oily skin, and blotchy unevenness. I kept my distance from powders and creams and colorful palettes, weary of its strange and seemingly impermeable powers, granting flawlessness and perfect complexion to expert users – i.e. everyone except myself. Whenever I attempted to pretty-up my face, it turned out all wrong. I used powder foundation during my early experimental years, and it simply did not provide enough coverage. Whilst using eye shadow, mascara, and eyeliner, I created too much of a bold expression, which didn’t bode well with my already bold facial features. Liquid foundation was either too dark, too light, too cake-y, too much. And lipstick was out of the question. I was so traumatized with my unfavorable experiences with makeup that I instead focused on maintaining a clean face with cleansers that contained salicylic acid, an antioxidant that could reduce inflammation in the pores of skin.
I had watched “beauty gurus” on Youtube before, but back in 2009, all I could find were girls experimenting with wild eye shadow pallets and bold, dramatic looks for dates and questionable outings. I couldn’t find the logic to how products were combined and applied to create very natural looks. Over the years, however, there has been an abundance of daily-look tutorials, copious product reviews, application tips, and an emerging logic to assist those who have zero intuitive understanding of this realm of life. I thought it might be worth showing you some of my very reasonably priced products that have worked for me so far. My collection is still very small, and thus not by any measure comprehensive, but hopefully someone can glean a bit of helpfulness from this post.
Firstly, a picked up this ecobeauty makeup bag from T.J. Maxx for roughly $12.99.


It comes with three main compartments that hold a fair amount of items whilst staying compact when folded up. I use this at home and hang it in my closet, but it’s certainly a viable option for traveling.
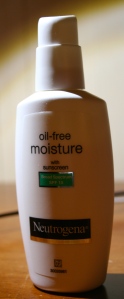
Now I’ll progress in order of the items I typically use on my face in an everyday context. I’ll start with a thorough face wash using a salicylic acid-based cleanser or scrub. Then I’ll moisturize with Neutrogena’s oil-free moisture with sunscreen (~$9.99), applying just enough for full coverage without over-doing it. This will provide the skin with enough moisture after washing the face so that foundation is less likely to dry out and forms cracks and creases. However, make sure to provide enough time (roughly a minute) between application of the moisturizer and foundation for more effective coverage.
Now on to the actual makeup-y part. I’ve found that using 1.) concealer for dark under-eye circles and acne or pronounced red marks, 2.) liquid foundation for my main coverage, and 3.) mineral powder for setting the foundation and working out remaining creases or unevenness has been the best process for my skin type (oily, blotchy, and acne-prone). For concealer, I’ve been using the Maybelline Instant Age Rewind (~$8.99) in light/pale.
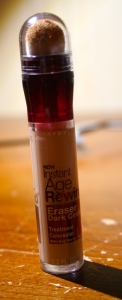
I’ll first apply this using blotting motions, then will buff the product out with a small concealer brush. I’ll then apply my favorite liquid foundation I’ve found yet, the Revlon Colorstay 24 hrs (~$14) in color nude, in small dots around my face with the same concealer brush. I’ll use my middle or ring finger to pat the foundation for full coverage, and then buff it out with a larger foundation brush.

My next step is fairly new. With a medium-sized kabuki brush, I’ll apply some bareMinerals Mineral Veil (~$21) in hydrating to set the liquid foundation and create a softer finish.

The rest of this post is going to be fairly open-ended. I haven’t exactly found the be-all-end-all of eye shadow palettes, blushes, bronzers, or lip products. But as someone with light/pale skin and relatively strong female facial features, I’ve found some colors to work better than others. As for eye shadow, I own a very, very, very old Urban Decay Ammo Palette which has some very nice colors to create a dazzling look without going over the top. It includes some neutrals, some pinks, darker golden shades for contouring, lighter shades for highlighting, and a couple of bolder colors to add variety. I’m sure the Urban Decay Naked Palettes have caught your attention at least once if you’re a Youtube fanatic. All three palettes contain very agreeable neutral colors in glittery, shimmery, and matte textures. Although they do come at a fairly steep price, I’m assuming the quality is pretty solid considering my experience with Urban Decay, so it might be something to consider. If you’re like me and not willing to spend over $50 on this stuff, I’d suggest trying e.l.f. I’m extremely satisfied with their 32-piece everyday palette that includes mainly neutrals in shimmery and matte textures, but they also have plenty of other products to choose from that are extremely affordable.
If you lead a fairly professional work or school life, I think the key in choosing workable and cost-effective palettes is to stick to those that have mainly neutral tones with few bolder colors. In terms of application, I’ve been using concealer on my eyelids before applying shadow to even the skin tone in that area by removing redness or blotchiness, and to form a base to help the shadow stay put on the lid. If you’re not keen on using concealer, you can certainly pursue specific eye-shadow primers to prep the eyelid. Once that’s done, I’ll start with contouring the outer portions of the lid and crease with browns, dark golden shades, and perhaps a bit of black, buffing the intensity with a larger brush afterwards. I’ll then focus on the mid and inner portions of the lid with neutral tones – light pink, rose, light gold, and light tan shades seem to work the best. I’ll then carefully highlight the upper lid near the brow and the inner corners of my eye with a pure shimmery or matte white, which works very fell with the contouring to bring focus to the eyes, making them look larger. If I’m confined to more of a professional look, I’ll skip the contouring all together and apply a single neutral color with a bit of highlight. At this point in my life, eyeliner hasn’t been a companion of mine. As per the strong facial features, even a touch of eyeliner appears too dramatic, but experiment on yourself!
As for lip color, I’ve found shimmering pinks and nudes to work best for me, but again, purchasing drug-store brand products in a variety of colors and textures is a great way to experiment and figure out what works best for you.
I hope this is at least slightly helpful for anyone who isn’t quite sure what direction to approach makeup products. The key to success here is the willingness to try a little experimentation and research, and to not give up in the face of failure.